How to Make a Cover Page in Word: A Step-by-Step Guide
Creating a professional cover page in Microsoft Word can significantly enhance the look and feel of your document. Whether you're preparing a report, a proposal, or a thesis, the first page is what catches the reader's eye. Microsoft Word makes it easy to add a stylish cover page and also gives you the flexibility to design a custom one. In this guide, we will walk you through the steps to create both built-in and custom cover pages, as well as how to remove them if needed.

Create a Built-In Cover Page in Word
Microsoft Word offers a variety of pre-designed cover page templates that you can use to give your document a polished look.
Step 1: Open your Word document
Start by opening the Word document where you want to add a cover page.
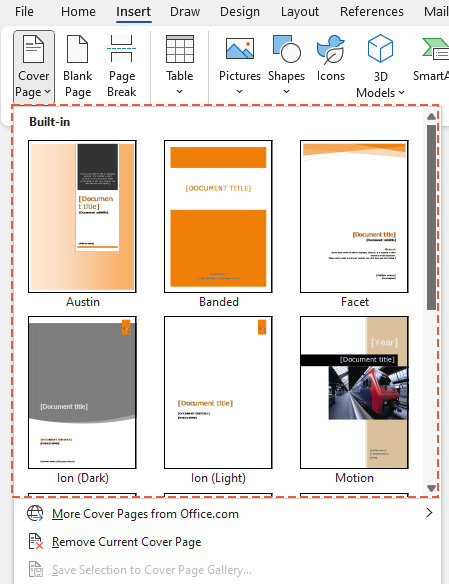
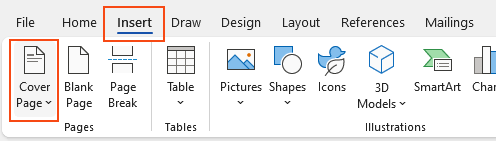
Step 2: Go to the cover page gallery
Click on the Insert tab and click on Cover Page in the Pages group. A gallery of built-in cover page templates will appear.
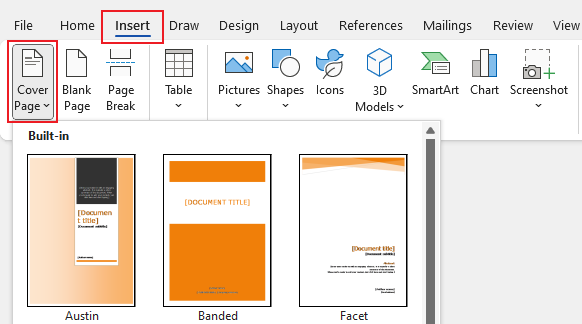
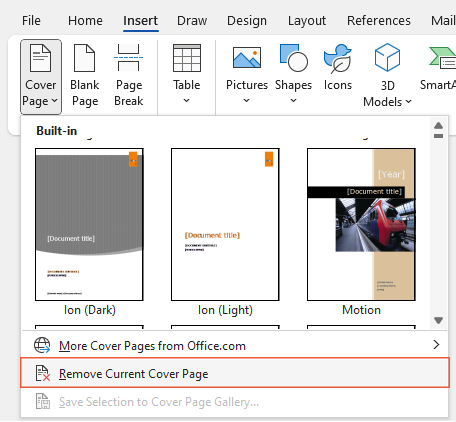
Step 3: Choose a template
Browse through the templates and select the one that best suits your document. Click on your chosen template to insert it as the cover page.
Result
Now the cover page is successfully created. You can easily customize the text and images in the template to match your document’s content and style.

- To Replace a Cover Page in Current Versions: In the latest versions of Word, inserting a new cover page automatically replaces any existing one, streamlining the update process.
- To Replace a Cover Page from Older Versions: If your document has a cover page created in an older version of Word, you must manually Remove the Current Cover Page before you can add a new one from the gallery.
🌟 AI Assistant for Word: Rewrite, Compose, and Summarize 🌟
Save time and effort with Kutools for Word's AI Assistant feature! 🚀


📊 Kutools for Word: Chosen by over 18,000 users. Enjoy a full-featured FREE trial with no credit card required! 🚀
Create a Custom Cover Page in Word
If you prefer a more personalized touch, you can create your own custom cover page.
Step 1: Design your cover page
Use Word's design tools to create your cover page. You can add text boxes, images, shapes, and more to design a unique cover page.
Step 2: Select your design
Once you are satisfied with your design, select all the elements on the cover page. You can do this by clicking and dragging your mouse over the elements or by pressing Ctrl + A to select all.

Step 3: Save the selection as cover page
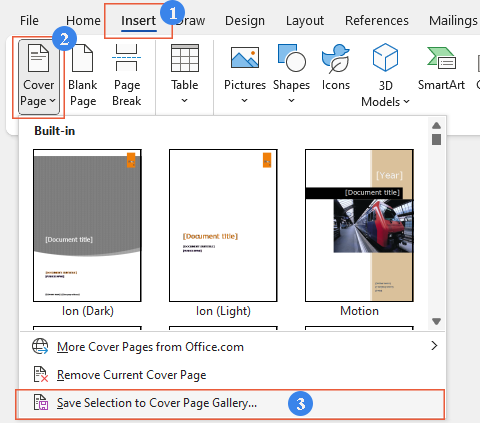
With your design selected, please do as follows:
- Go to the Insert tab.
- Click on Cover Page.
- Choose Save Selection to Cover Page Gallery from the drop-down menu.
Step 4: Name your cover page
In the Create New Building Block dialog box that appears, name your cover page in the Name textbox and add any descriptive information if needed in the Description textbox. Click OK to save your custom cover page to the gallery.

Result
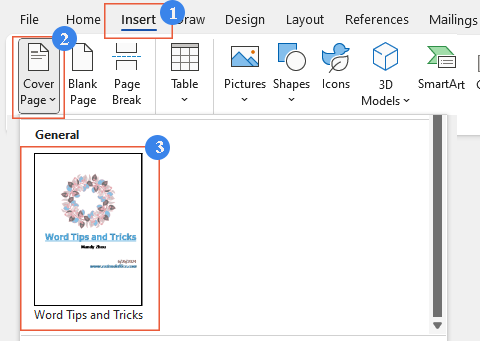
Your custom cover page will now be available in the cover page gallery for future use. To insert the custom cover page in Word, simply click Insert > Cover Page , then click on the custom cover page in the gallery to insert it in Word.
Remove a Custom Cover Page from the Cover Page Gallery in Word
If you no longer need a custom cover page in the gallery, you can easily remove it.
Step 1: Go to the cover page gallery
Click on the Insert tab and click on Cover Page in the Pages group.
Step 2: Remove custom cover page from the gallery
- Right-click on the custom cover page you want to remove from the cover page gallery.
- Select Organize and Delete from the context menu.

- In the Building Blocks Organizer dialog box that appears, select the custom cover page, click the Delete button, then click the Close button to close the dialog box.

- Tip: Please be careful not to select a wrong cover page.
Result
The custom cover page will be deleted from the gallery, but it will not affect any documents where it has already been used.
Remove the Current Cover Page in Word
If you need to remove a cover page from your document, follow these simple steps:
Step 1: Enable Cover Page feature
Click on the Insert tab and click on Cover Page in the Pages group.
Step 2: Remove the current cover page
From the drop-down menu, select Remove Current Cover Page.
Result
This action will delete the cover page from your document, leaving the rest of your content intact.
By following these methods, you can easily create, customize, and manage cover pages in Microsoft Word, ensuring your documents always make a great first impression. For more Word tips and tricks, please click here to access our extensive collection of hundreds of tutorials.
Related articles
How to Add the Degree (°) Symbol in Word (Windows & Mac)
This guide will walk you through different techniques for inserting the degree symbol in Word on both Windows and Mac.
How to Add Page Numbers in Word: A Step-by-Step Guide
This guide will walk you through the process of adding, formatting, and removing page numbers in Microsoft Word.
How to Add a Citation in Word: A Step-by-Step Guide
This guide provides clear, step-by-step instructions on how to manage citations in Word, including how to add new sources, use existing ones, insert placeholders, edit sources, and finally, compile a comprehensive bibliography.
Best Office Productivity Tools
Kutools for Word - Elevate Your Word Experience
🤖 Kutools AI Features: Generate Content / Rewrite Text / Document Q&A / Get Quick Answers / Translate documents / Polish Document (Preserve Format)...
📘 Document Mastery: Split Pages / Merge Documents / Export Selection in Various Formats (PDF/TXT/DOC/HTML...) / Batch Convert to PDF...
✏ Contents Editing: Batch Find and Replace across Multiple Files / Resize All Pictures / Transpose Table Rows and Columns / Convert Table to Text...
🧹 Effortless Clean: Sweap away Extra Spaces / Section Breaks / Text Boxes / Hyperlinks / For more removing tools, head to the Remove group...
➕ Creative Inserts: Insert Thousand Separators / Check Boxes / Radio Buttons / QR Code / Barcode / Multiple Pictures / Discover more in the Insert group...
🔍 Precision Selections: Pinpoint Specific Pages / Tables / Shapes / Heading Paragraphs / Enhance navigation with more Select features...
⭐ Star Enhancements: Navigate to Any Location / Auto-Insert Repetitive Text / Toggle Between Document Windows / 11 Conversion Tools...

Best Office Productivity Tools
Kutools for Word - 100+ Tools for Word
- 🤖 Kutools AI Features: Generate, Rewrite, Summarize, Translate Documents / Get Quick Answers / Polish Document (Preserve Format)
- 📘 Document Mastery: Split Pages / Merge Documents / Batch Convert to PDF
- ✏ Contents Editing: Batch Find and Replace / Resize All Pictures
- 🧹 Effortless Clean: Remove Extra Spaces / Remove Section Breaks
- ➕ Creative Inserts: Insert Thousand Separators / Insert Check Boxes / Create QR Codes